
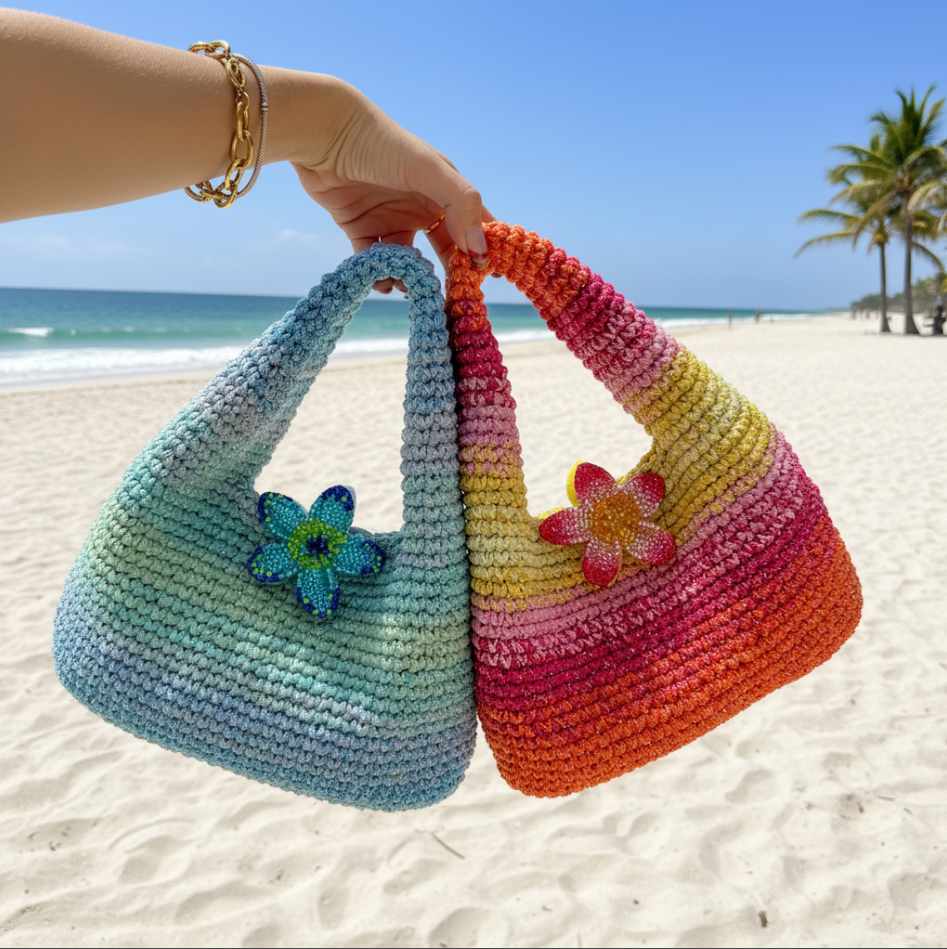
A donut bag is one of those projects that’s small, fun, and actually useful. Here’s everything you need to make one — no fluff, just the pattern.
What is a donut bag?
It’s a small crocheted bag shaped like a donut. It has a hole in the center and sits flat when hung or placed on a surface. Most people use it as a coin purse, a small accessories pouch, or just a fun bag to carry around.
It’s a beginner-friendly project. If you know how to make a magic ring and single crochet, you can do this.
What you’ll need
Yarn
Worsted weight (2 colors)
Hook
5 mm (US H/8)
Notions
Zipper or button closure
Extras
Yarn needle, scissors
For a basic donut shape, you’ll work two flat rings and sew them together. One color for the “dough” and a contrasting color for the “icing” on top.
Pattern overview
This pattern uses US crochet terms. Gauge isn’t critical here — the bag can be a little bigger or smaller and still work fine.
Abbreviations: MR = magic ring, SC = single crochet, INC = increase (2 SC in same stitch), DEC = decrease, SL ST = slip stitch, CH = chain
Step-by-step instructions
Make two rings (front and back panels)
- Start the center hole. Make a MR. CH 1. Work 6 SC into the ring. Pull tight. SL ST to join. (6 stitches)
- Round 2. CH 1. INC in each stitch around. SL ST to join. (12 stitches)
- Round 3. CH 1. *SC 1, INC 1* repeat around. SL ST to join. (18 stitches)
- Round 4. CH 1. *SC 2, INC 1* repeat around. SL ST to join. (24 stitches)
- Round 5. CH 1. *SC 3, INC 1* repeat around. SL ST to join. (30 stitches)
- Round 6–7. CH 1. SC in each stitch around. SL ST to join. (30 stitches)
- Round 8. CH 1. *SC 3, DEC 1* repeat around. SL ST to join. (24 stitches)
- Fasten off. Leave a long tail for seaming. Repeat all steps to make the second panel.
Quick tip
The center hole is the trickiest part. Don’t pull the magic ring too tight at first — leave enough room to work your stitches in, then tighten it once you’ve got all 6 SC in.
Adding the “icing” detail
Pick a contrasting color — pink, white, or chocolate brown all work well. On one panel (this becomes the front), join the new color at any stitch in Round 5. SC across rounds 5–7 in the new color, working only on the outer section.
This mimics the look of icing drizzled on a real donut. You can make it neat or a bit wavy — both look good.
Seaming and adding a closure
Place both panels wrong sides together. Use a yarn needle and whip stitch around the outer edge, leaving about a 3–4 inch gap for your zipper or button loop.
For a zipper: sew it into the gap by hand. Use a matching thread color and small, neat stitches. For a button closure: make a small CH loop at one end of the gap and sew a button on the other side.
Once the closure is done, whip stitch closed any remaining gap and weave in all ends.
Adding a strap
This step is optional but makes it easier to carry. A simple chain strap works great.
- Cut a length of yarn about 40–50 inches long
- Double it, then braid or twist it for a thicker cord
- Attach both ends to the outer edge of the bag with a few secure stitches
Or just CH 80 in your main color, slip stitch back along the chain to close, and attach that as a strap.
Make it your own
Add sprinkles with small French knot embroidery stitches in bright colors. Or sew a few beads on the icing section. Small details like these make it look a lot more finished.
Common issues and how to fix them
The bag is curling up at the edges. This usually means your tension is too tight. Try going up half a hook size or loosening your grip.
The center hole is closing up. You’re pulling the magic ring too tight too early. Work all your stitches first, then close the ring.
The two panels don’t match in size. Check your stitch count at each round. One extra stitch can throw off the shape. Count as you go, not just at the end.
How long does it take?
Most people finish this in 2–3 hours. If you’re new to crochet, add another hour. It’s a good weekend project — something you can pick up and put down without losing your place.
Final thoughts
The donut bag is a small project with a lot of personality. It’s useful, quick to make, and easy to customize. Once you finish one, you’ll probably want to make a few more in different colors.
If you share yours online, tag it so others can see. It’s nice to see how different yarns and color combos change the whole look of the same pattern.
for to be the first know about our new crochet pattern visit our Facebook page